Showing posts with label wwII. Show all posts

Saturday, 22 April 2017

Battle for Braaga 2 - Engagement

The battle opened with a few shells from West Friesland (off table) medium artillery dropping on the edge of the town. One salvo reduced a damaged building to mostly rubble and a couple dropped into established depressions, turning them into muddy craters as the long range guns sought to set up programmed fire points from advice being passed from the command unit on Fuchsschwarz Hill to the right rear flank of West Friesland lines.
West Friesland battle lines move 1.

The sound of gunfire and explosive detonations covered the sound of tanks and other vehicles revving up as the West Friesland assault commenced.

After an initial soft advance by the West Friesland forces, the central column began to move in earnest on the town whilst overhead, spotter aircraft hummed noisily, overflying the enemy positions.  Whilst already installed East Friesland men held position, the arriving Hessnovinians began to unload men and equipment from vehicles.
Transports start to unload

Soft vehicles park and unload men
West Friesland forces advance steadily
As the West Friesland column moved up, confident as no East Friesland weapons had yet been able to penetrate the armour even on the PZI other than the threat of artillery fire, rifles cracked from the roof of a building as snipers tried to strike at the advancing infantry. A moment later, the first shell from a 2pdr battery in the town struck close to the advancing vehicles. Undaunted, the West Frieslanders pushed on.
West Friesland Column reaches the outskirts of town
First casualties were taken by the advancing West Friesland column as sniper fire from the roofs of the buildings on the edge of town hit troops as they emerged from the trees.  A few moments later, the PZ1 machine guns rattled as it moved out into the street and the radio officer called down artillery fire on the sniper positions and now it was East Friesland men that fell.
West Friesland Recon. head back to forward airfield.

Meanwhile, the Hessnovinian force had moved into several buildings and was moving into position to strike.  West Friesland aircraft in the form of a squadron of Fokker biplanes whirred overhead, carrying out vital reconnaisance. Having spotted the T34 tanks and movement of troops from soft vehicles, the aircraft turned swiftly and headed for the advance airfield where they could deliver their reports to the West Friesland command.
Hessnovinian forces advance to edge of Braaga
A general advance order had been issued by the West Friesland commander, Lt Colonel Kruger resulting in a push forward by the two units with armoured cover and the forward observer unit which now moved towards the woods on the left flank, hoping to get a good look at the East Friesland battle lines.
West Friesland units respond to general advance order.
Fwd Observer unit moves towards woods on edge of town.

Colonel Uri Czherjenko, the comander of the Hessnovinian forces and, nominally, what remained of East Friesland men, had taken up a room in the smithy and garage from which he could direct the defence of Braaga.
Base of Hessnovinian Ops. Artillery unit stands by.
Despite receiving intelligence from the aerial recon, Kruger was unable to use the information to change the course of a battle he had now committed forces to. With the 1st Platoon, Hawk Company advanced to the town's edge, he could not bring long range artillery to bear on the Hessnovinian armour.  The PZ1 having made a dash forward, now recoiled as a T34 loomed into view and fired a shell that missed closely. As the Hawk Company moved in to attack Hessnovinian and East Friesland positions, a second T34 moved into a defilade where artillery fire had left a crater. Unable to go forward or back without offering a target, the PZ1 and advance troops tried to push into Braaga.
Exchange of tank fire
 A moment later, the inevitable happened as the PZ1 was hit in the flank by the 7.62cm cannon of a T34 and was knocked out.  A PZIII shell bounced off the T34 which backed off into a sidestreet but the initial success of Hawk Company's platoon in attacking the East Friesland artillery position turned sour as they were overrun and took heavy casualties in a firefight with advancing elements of the Hessnovinian 24th Motorised and those within the Hessnovinian field HQ overlooking that position.

An assault by West Friesland 2nd Platoon on the white house over on the left flank was beaten off with casualties on both sides but the West Friesland troops took the heavier damage.  Meanwhile, the East Friesland armoured car moved out to rake the 3rd Hawk Company Platoon with fire which was also backed by more sniper and now machine pistol rounds from buildings on the edge of the town.

The 24th Motorised were now in complete control on their right flank having defeated the West Friesland assault. The white house was re-enforced and the ruins behind it, to further consolidate the hold.
On the edge of the wood, West Friesland forces fell back in the face of resistance and superior armour facing them.  The mortars dropped a few shells on positions believed to be held by the Hessnovinians but it was becoming clear that Braaga was too well held to fall as previous settlements had.  The West Friesland forces needed to regroup and consider the impact of finally facing armour and troops that could not be easily overrun.
To add to West Friesland woes, the PZIV that had been heading the advance on the West Friesland left flank was hit by a T34 and brewed up as the shell penetrated the front armour. No East Friesland weapons had been able to damage a PZ armour unit since the action began. Suddenly, the boot was on the other foot.

That signalled the end.  Kruger, seeing he had lost over half of his armour and the best part of two platoons, withdrew his forces leaving Czherjenko in control of Braaga. It was the first engagement featuring these two leaders in a new phase of the war.

Monday, 13 March 2017

East Friesland - Battle for Braaga

After the fall of Kovoska, the East Friesland forces were driven back swiftly by the Barovian backed West Friesland army.  Only when assistance arrived from The People's Republic of Hessnovinia began to reach the front line, were the East Frieslanders able to start putting up resistance.

This battle takes place nearly 3 months into the war. A single platoon of East Friesland troops hold the outskirts of Braaga against the onrush of the West Friesland advance.
 
A small platoon take positions along the western edge of Braaga
Outdated East Friesland guns await the order to fire.
 A full company of West Friesland men have arrived in the form of four platoons and a command unit backed up by Barovian armour and guns. They have complete air superiority, allowing the West Friesland bi-planes to fly freely, dropping small bombs, carrying out reconnaisance and strafing targets.
West Friesland platoon with PZIII
West Friesland platoon with old PZIV

Unbeknown to either force, a Hessnovinian company is about to push into Braaga to support their East Friesland allies with armour and vehicles. This element of the 24th Motorised Brigade is just one of the new entrants into the war that are about to change the one sided nature of the conflict.
Hessnovinian C Platoon with half tracks and scout car

Watching his troops advance, Lt Colonel Marc Kruger, in command of the West Friesland forces, signals the light artillery to prepare to fire on targets provided by the forward observers.
West Friesland Command Unit wait on a wooded hill

PAK artillery waiting for fire orders
The West Friesland 1st Platoon of Hawk Company of the 11th Battalion advance along a narrow track while elements of the 2nd Platoon, gunnery and observation close in on a deserted warehouse.
1st platoon  Hawk Company- West Friesland 11th Battalion

Forward Observation Team advance position.
On the eastern edge of the field, the Hessnovinian commander, Colonel Uri Czherjenko commandeers a building with attached garages and orders A and B platoon to move up.
Hessnovinian A Platoon unload in front of command building
B platoon with T34s move up also.
(The picture above shows the platoons gathering. The figures on the right are the command group - where figures placed against a building, they will be considered inside.)

West Friesland had complete air superiority at this stage of the conflict.
Thus the stage was set for the first clash involving Hessnovinian troops directly and one that would lead to a further escalation as Barovian units would respond in kind within a month of this.  On the East Friesland side, then, one platoon of EF light infantry with soft transport, 3 platoons plus command unit, Hessnovinian 24th Motorised Brigade plus 2 half tracks, one armoured patrol car, 2 x T34 main battle tanks and 2 soft vehicles.   On the West Friesland side, 3 standard platoons and 1 artillery platoon with PAK88 gun, 1 command unit with soft transport and command vehicle, 1x PZ1, 1xPZIII, 1xPZIV, 1 half-track, 3 x Fokker Bi-Planes with 2 AP bombs and machine guns. 

The objective - control of Braaga.  This battle represents one small slice of the greater conflict for the town and, as normal in such campaigns as this, the outcome will decide the overall result of this phase of the struggle for the town.  To be continued.....

Saturday, 2 April 2016

Action on the Semille Road - Initial Activity

The Semille Road runs from Le Meux in the south-west, linking to the Aucherre road and bridges across the River Laune.  For Doza to be able to move onto the next phase, it needs to secure Aucherre, Semille and push back Pays forces at Falcieu which are assisting in keeping Dozan troops coralled in Le Meux.

Action on the Semille Road is a clash between the Dozan 18th Battalion "Tombee de la Nuit" and the Pays De Cheval 3rd Battalion - Green Rifles.  Victory for Doza opens the way for the Le Meux forces to break out and assault those that remain in the holding positions.  Victory for Le Pays Cheval pushes back the Dozan attack and allows a counter thrust at Le Meux, designed to retake it and destroy Dozan forces that are stuck, there.

Pre-start card draws determined that the day opened with fog thinning to mist later but reducing the visibility for the first ten moves to just 200m (20cm). On the Dozan side, the overall commander (Major Saul Le Valiere) was a +1 experienced leader and force morale was +1 (all units) whereas the PDC were all standard with a +0 leader (Major Renne Manville) but one company under an impetuous commander.  Fate also decreed that the Dozans would have five opportunities to re-roll a result whereas the PDC would suffer from one set of orders lost or deliberately ignored.

 The Dozan Right - Somua tanks wait to roll

On the right wing, the Dozan tank squadron had approached through the woods but remained concealed from enemy gunfire. One company was advancing behind the tanks while a second deployed around the radio van in a more defensive posture.
On the left, the half track with the HQ company was moving up under cover. Half the force deployed into the trees, half (behind the vehicle) were on board - A note here. I place troops behind buidings and vehicles that they are in otherwise I forget them if I move them off table.

Meanwhile, a good deal of the PDC defence has gathered about St Bartholomews church on the edge of the village of Dessinaut. One company has left its motorised transport to use an advancing Welland tank as cover. Another has set up in the graveyard where an MMG has been mounted up.  The third has stuck its neck out going along the road, using the walls as cover led by the over-intrepid Captain, Gerard Valencario. One of the squads from the advancing company has even moved up beyond the road into a foxhole.

The view from behind the lines.
The second "Welland" tank hung back using an old defensive redoubt on Jurot's Hill as partial cover and a viewpoint. From here, you can see the PDC radio van hidden in behind some sandbags and in the distance, the "Hunter" APC slipping along behind the inn.


With initial activation favouring the Dozans, the Somua tanks roll forward into the fogbank. C Company move in behind them, advancing steadily as ordered while B company advance and set up positions in Valse Wood.  A Company swing right and prepare to move up to the road. With the fog covering the advance, the PDC can hear the sounds of engines and tracks but see nothing.
In the centre, Valencerio's 3 Company have taken a strong central position along the wall and in the foxhole. The forward artillery observer in the daimler apc has also moved up, frustrated by the fog from being able to call in early artillery fire.
1 Company has now established a defence in the church (1 platoon) and graveyard. A supporting Welland tank takes a position using the wall as part cover as it seeks a target.
The PDC have moved a platoon from 2 company into the inn while the remainder remain concealed behind a hedge. The second Welland tank is on its way forward while the motorised units go around to the rear exit of the church.  The PDC are content at this stage but the fog has prevented an early use of artillery to slow the Dozan advance.  On the hill overlooking the road, the Dozan radio van is receiving a stream of information as the HQ company start a wide move to the left intending to head straight at the inn.

Under normal circumstances, the first round of fire between armour and also the long range artillery bombardment would have commenced. With fog restricting vision, the PDC can only guess at strength and disposition of the enemy and do not care to waste the opportunity they have.  The Dozans would prefer to use their superior armour at range but the fog is suiting them as they can advance out of cover unseen and get infantry forward.

Two moves in, then. The next should see the first real action.

Friday, 1 April 2016

Battalion Level WW2 Gaming

I definitely go along with Shaun Travers (http://shaun-wargaming-minis.blogspot.co.uk) that somewhere around Battalion or maybe company level actions are a nice size to manage and use the table effectively.  More than a battalion and there is really rather too much to consider as well as the issue with it getting just too crowded.

I am working on a basis (using 1/72 troops in the latest series that I am going to record, here) of reducing numbers down by a factor of 10 so a section/squad becomes 1 man so let's say 3 to a platoon and with HQ 12 to a company.  Since 3 companies plus an HQ element make up a battalion, that's going to be about 50 men plus other elements for each side (where the numbers are equal). That ought to be manageable.

When I play 1/35 (or full size soldiers of the standard toy sort), it's better to keep to a maximum of 3 x 10-12 men plus elements or it really gets crowded so it's nice to either scale down and make 12 men a platoon operating in small skirmishes or use the same scale as above.

I also have 1/300 scale modern in my collection.  That ought to be played at full numbers but I expect I will settle on a reduced number where one base = 1 squad with 3 bases making a platoon plus odd elements.  Of course, modern organisation is very different from the past. We will see.  I remain open on that until I have exercised 1/72 again.  It has been some years since I have pulled them out and you will have to excuse me as they will not all be painted at the outset.

When I found I had time, recently, to return to wargaming and get my collection from the loft, I found that I had neglected to paint an enormous number of troops and other items.  If I could borrow the TARDIS, I would certainly kick my teenage self up the backside and tell him to paint troops when bought and not just wait and store them.  I now have a gargantuan task.  Not only do I have an extensive collection of soldiers from many periods but I have had to rebuild most of the scenery pieces and other items I want, repaint most of the armour and many other units beside.

I digress.  So back in the alt-earth that I have been mapping out using my old fantasy world as a base, it was 1942. The last major war was thirty or so years earlier when the rising communist alliance and the facist alliance more or less went head to head but via anyone else whose land was either valuable or in the way. In the end, the Allied Forces of the East Indies Alliance, Hardican Empire and a good portion of the free democratic world turned the thing around, beating back the invasion and at a high cost to several of the old powers.  One beneficiary was Doza, a French-like state who joined the allies on that occasion.  Back in the 1820s, they were the enemy, having attempted to conquer the old Nordovician Empire and surrounds.

By 1942, Doza had quietly built up a large army, turned out armour and a new air force. Rumour said that they were going to intervene in Northern Tropicania from Tripotania Maxima where they held part of that land (Dozan Tripotania). A potential campaign against the poorly armed Emirates and maybe the Surmeyan Ephiniate might follow.   The Papal forces could be allied to such a campaign. The Pope had been calling for action against the Surmeyans for supposedly preventing pilgrims from having access to holy sites.

Some analysts, however, suspected Doza were gearing up for a much more serious war and one that did not require them to set their fleet against other powerful factions. If they invaded their neighbour, Le Pays De Cheval, its forces were woefully old fashioned. That state had complete faith in gunnery and had established gun positions and trenches all along the border "The wall of steel" they called it. A spearhead of armour and fast moving vehicles could penetrate this and use manouvreability to quickly neutralise the "Wall of Steel".

Some nations moved to try to reduce the likelihood of war by repealing the international moritorium on arms dealing, allowing countries that had fallen behind to buy arms on the market and so make themselves a lot harder to overrun. Hardica in particular, urged the Nordovician East Indies Alliance to take the opportunity and to ensure that countries like Pays De Cheval amd Aquila were ready.  They brokered deals between the old communist enemy, Tobaria and countries that needed armour and small arms. Hardica supplied weapons at good rates, itself and persuaded Esjamer to sell to the Arabic countries.

Despite the effort to persuade nations to bring their security to some standard and to always have some mobilised troops, the inevitable occurred.

At 03:30 Zulu time, Dozan armour breached the Pays De Cheval border in at least five places. Heavy weapons teams followed, using LMG, MMG, explosives and flamethrowers to clear the trenches and take out gunnery and sniper nests. Half tracks and lighter tanks then advanced, the high power machine guns mowing down retreating soldiers.  The Pays De Cheval troops quickly realised that the border defence was down. They moved back to secondary defence positions.  Most of those were overrun in the second phase of the Dozan attack. Now, the Pays De Cheval have established two main commands, one at Semille on the River Laune and one at the capital, Verdoune on the River Val.  Nordovic has also mobilised and a state of war exists between it and Doza.  Some older Nordovician armour has been sent to assist the Pays forces. Nordovician command has bases at Furneux, Thessia and the capital, Riassa.    The actions planned are linked so depending on results as to which scenarios get played.

Action on the Semille Road


The decision tree is a simple one. There are three seperate actions by Dozan forces but the thrust from Le Meux depends on the Semille Road being in friendly hands.  Forces that survive carry through to linked scenarios so Semille (Dozan) forces go to Advance on Semille whereas Le Pays forces go to add to the counter at Le Meux if they win. Similarly, if Doza fail to win at Le Meux (Breakout), Le Pays troops go to Counter Attack and Dozan retreated forces remain. At Aucherre, if Le Pays win, their forces add to the Falcieu Factor.  If Doza win at Aucherre, then that releases forces to Advance on Semille.  If Le Pays win at Aucherre and at Falcieu then they push Doza back to Pantinole and carry forward all forces against what has survived of the Le Meux and Aucherre Dozans.

Given the balance, a Le Pays victory is a long shot.  The Dozans have the initiative and better equipment. The forces for Action on the Semille Road are shown below;
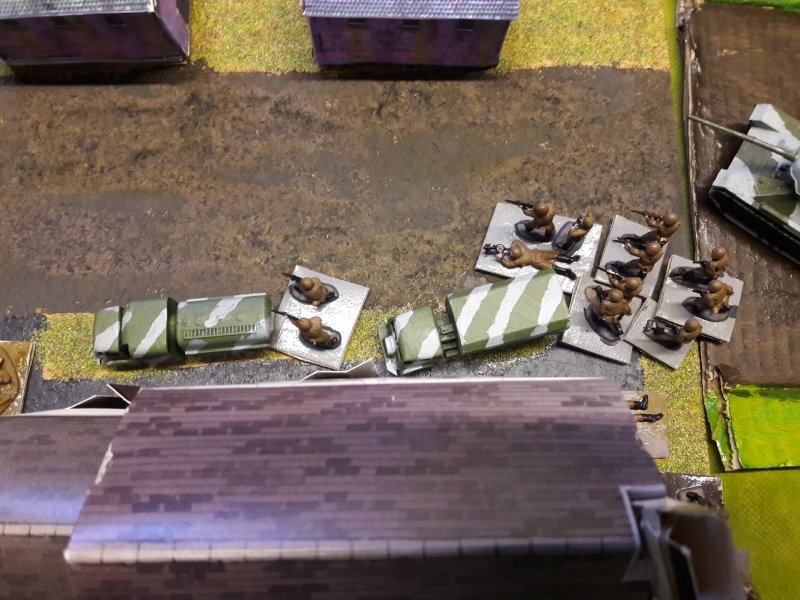
The Le Pays De Cheval have been bolstered by the arrival of Nordovician armour but the squadron is one short, already. They have two small Nordovician N2 "Welland" tanks, a small apc forward observer for the artillery (a daimler pretending to be a humber), a radio van and a panhard apc posing as a Nordovician "Hunter".  Three companies of foot (3-4 men to a platoon) make up the battalion.  The HQ element is the apcs and radio truck where command have men. The Pays De Cheval have three off table fire resolutions from 25mm howitzers.  Programmed fire has been set on a small wood on the right, a foxhole nearby and the roadside opposite the inn.

     The Dozan forces are three companies plus an HQ company represented by the FFL. The HQ unit is a light scout one with rifles only but come with a half track that sports a high velocity MMG and an LMG. Half the company will be on board.  They also have a radio van to co-ordinate with the armour.   Three Somua tanks make up a squadron of armour attached to the 18th "Tombee De La Nuit" Battalion.  They have no off table artillery as the units are thrusting forward so fast but they can call an air attack delivered by a pair of Dewoitine D520 fighters carrying a single bomb slung under the fusilage and using strafing in addition.

You may notice that I have not used bases at a set scale as I woulld with most eras. With modern, I like to vary as the movement of men and way they operate is so variable that you find individuals operating at a distance from their unit, others grouped and so on. I like to reflect this by creating differing spaces if you put a unit together, at all.  I will probably trim some off once I have tested this in practice.

I may revise the scale of troops down to 10-12/platoon level and make it company rather than battalion.  It's not really that important. The scale of the overall action may be the deciding factor.